Start Canopus Edius, place two video clips in the Timeline. In the Transition folder you will see a proDAD directory which contains the Vitascene Transition that is ready for use.

Now use drag and drop to place the Vitascene Transition between the two clips in the Timeline. The Vitascene software will not start.
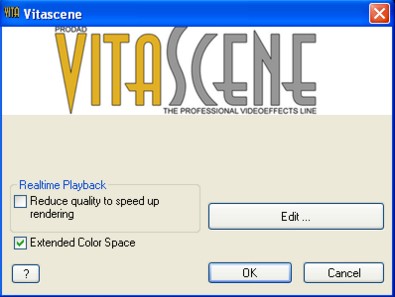
Once a transition has been selected in the Timeline, Edius displays (as a property) the effect for this clip by name. Double click on the name to open the Vitascene-Control dialogue box.

This displays the following options:
1. Reduce quality to increase speed
This attempts to maintain a real-time preview, even for elaborate effects, by employing faster processing.
2. Expanded color palette
This makes full use of the YUV color space, achieving a maximum level of up to 1.0 volt, which is the quality standard for broadcasting.
Click on the Edit button to start the Vitascene software.
Once the project has been edited and completed in Vitascene, simply press the F12 key or click on the symbol ![]() to return to Canopus Edius.
to return to Canopus Edius.
This will automatically save the Vitascene project.
Using the Canopus-Inspector you can obtain more information on the Vitascene transition (including for example its start position, its end position as well as the duration of the transition in the Timeline).
